Canva is a pretty easy tool to understand, but there are some sneaky pitfalls you might overlook. Today, we’ll cover some of the biggest mistakes you’re probably making in Canva and how to avoid them.
1 Forgetting to Customize the Dimensions of Your Canvas
If you want your visuals to be of the best possible quality, you need to tailor your content to the different dimensions of websites and social media. One of the biggest mistakes beginners make in Canva is not customizing their dimensions.
You can customize your dimensions manually by going to Create a design > Custom size and entering the correct height and width. You can also pick one of the pre-made layouts if you already know where you’ll use your graphics and images.
If you’re not sure what the right dimensions are for each platform you use, see this guide that outlines the image sizes for Facebook, X (Twitter), and more.
2 Not Using Canva Projects to Organize Your Files
I use Canva for various projects, and I’m still guilty of leaving everything disorganized sometimes. This may not be a huge problem if you remember your file name, but things quickly become confusing when you have many projects.
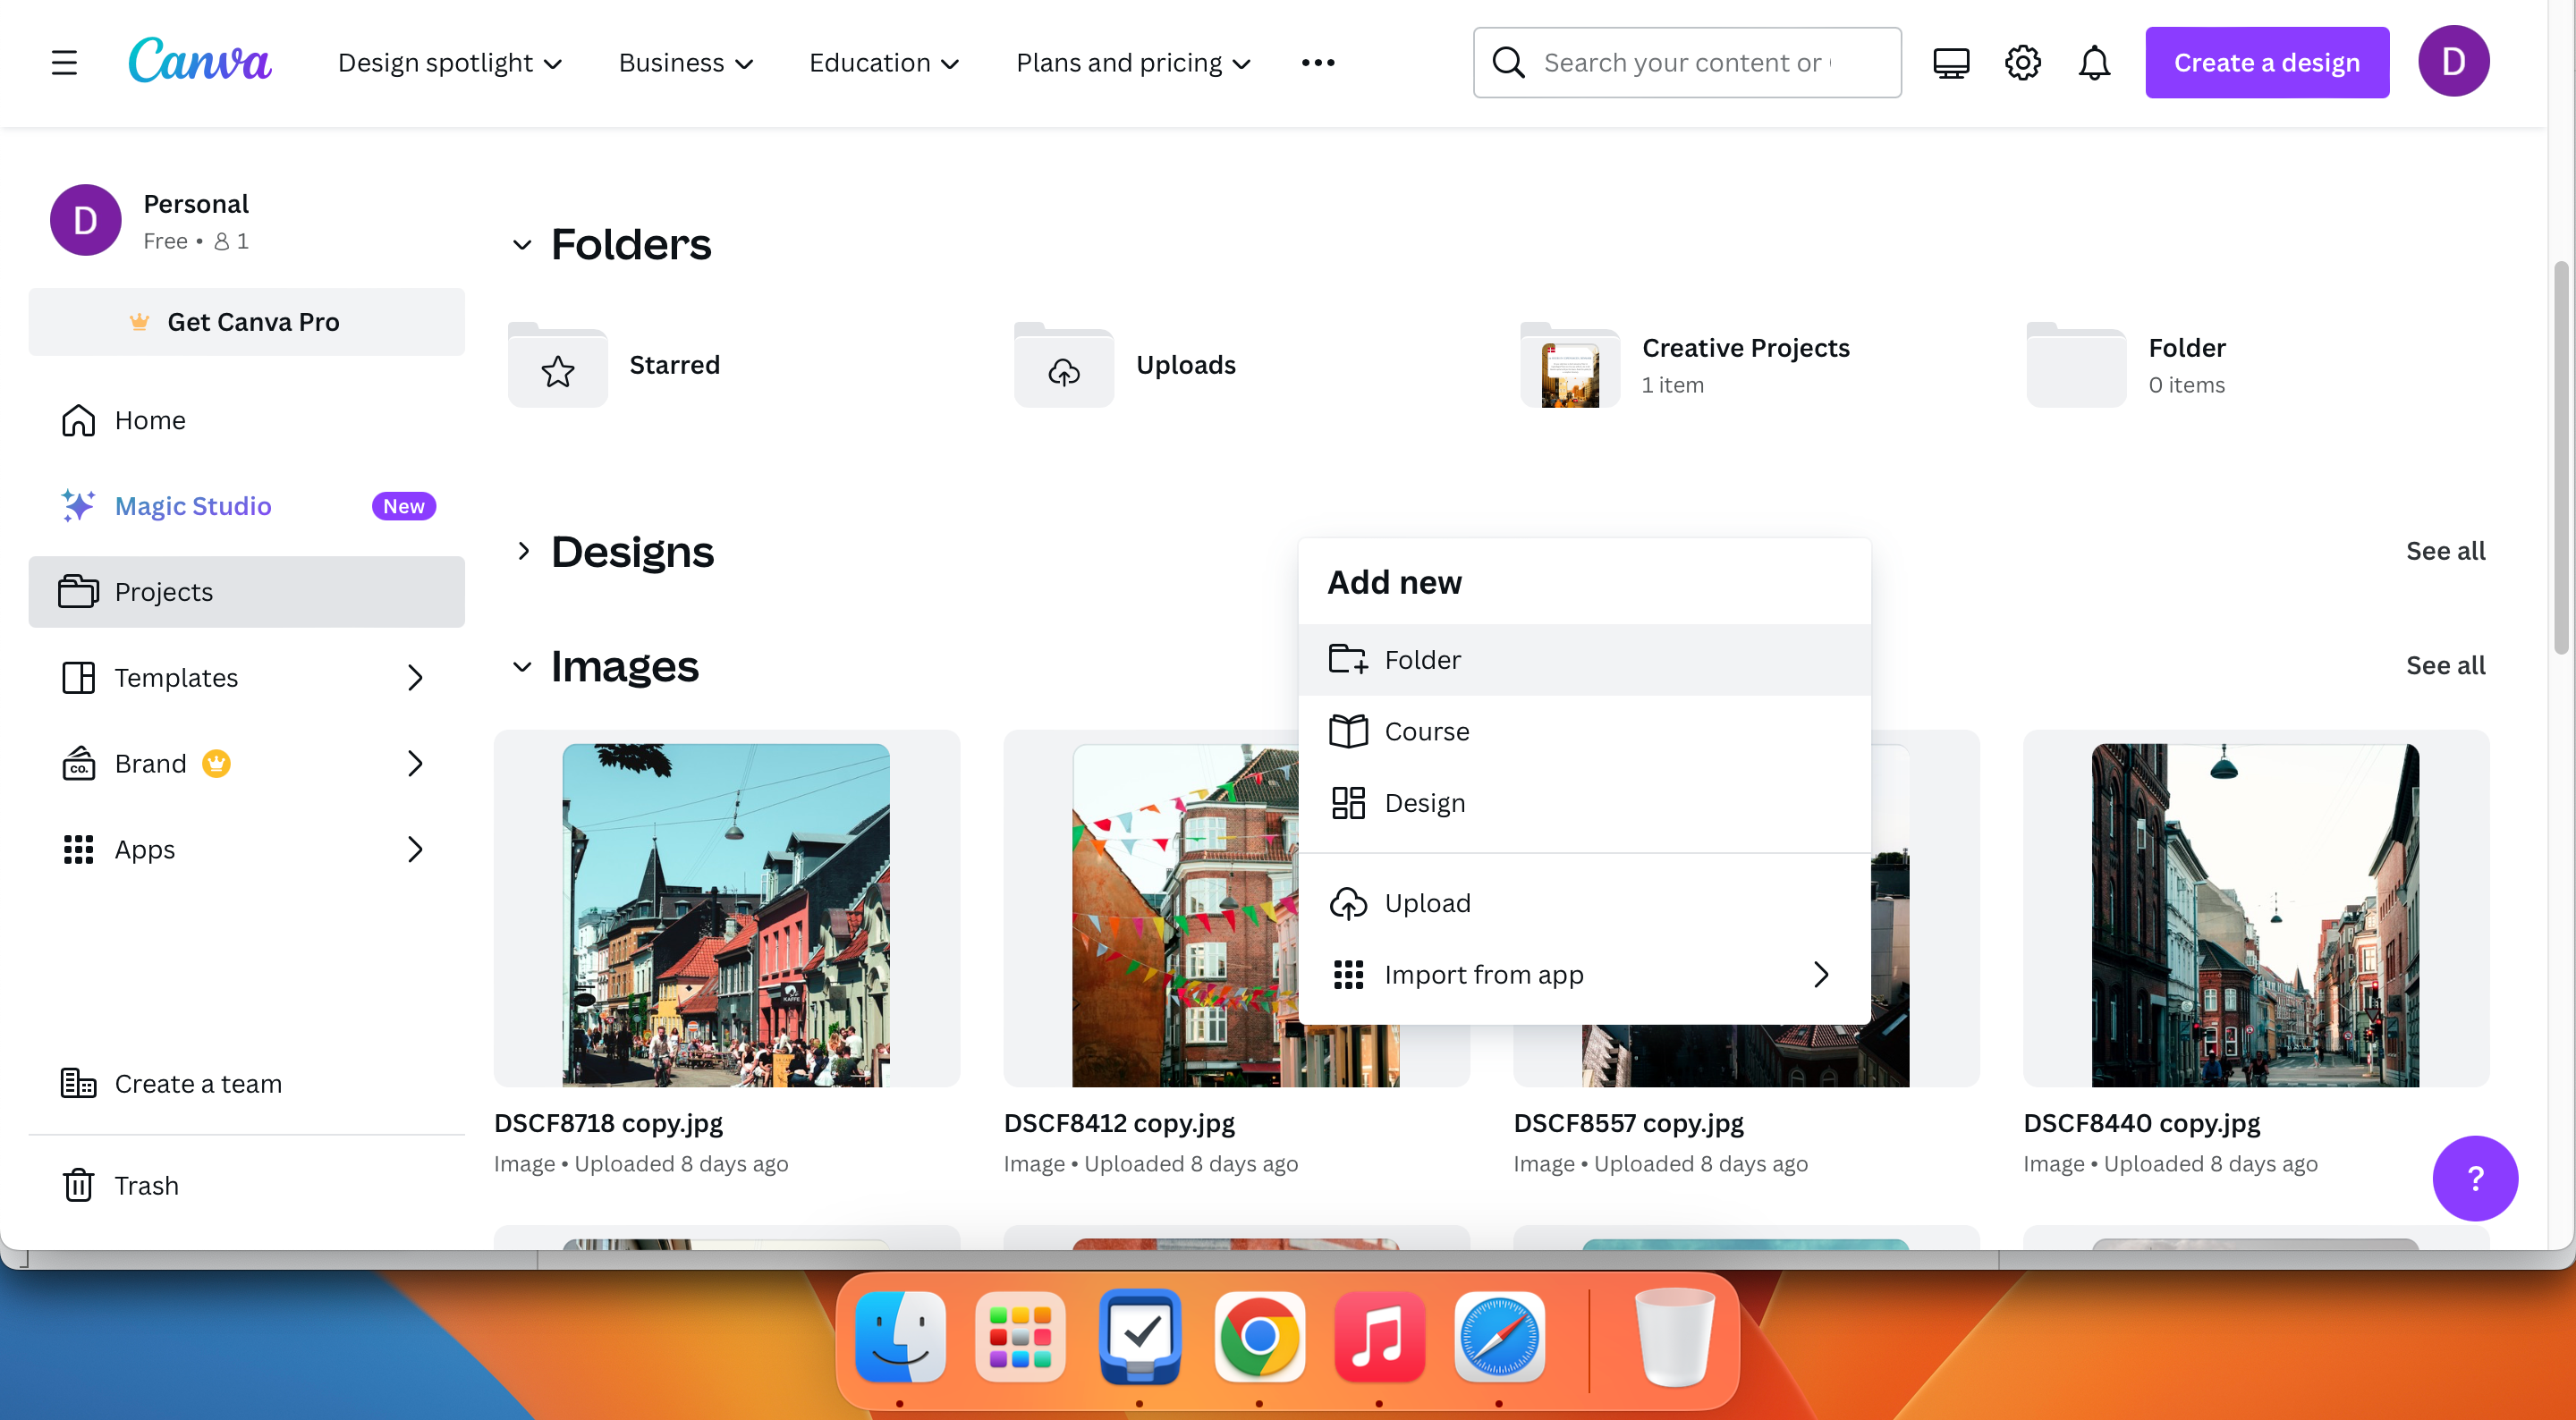
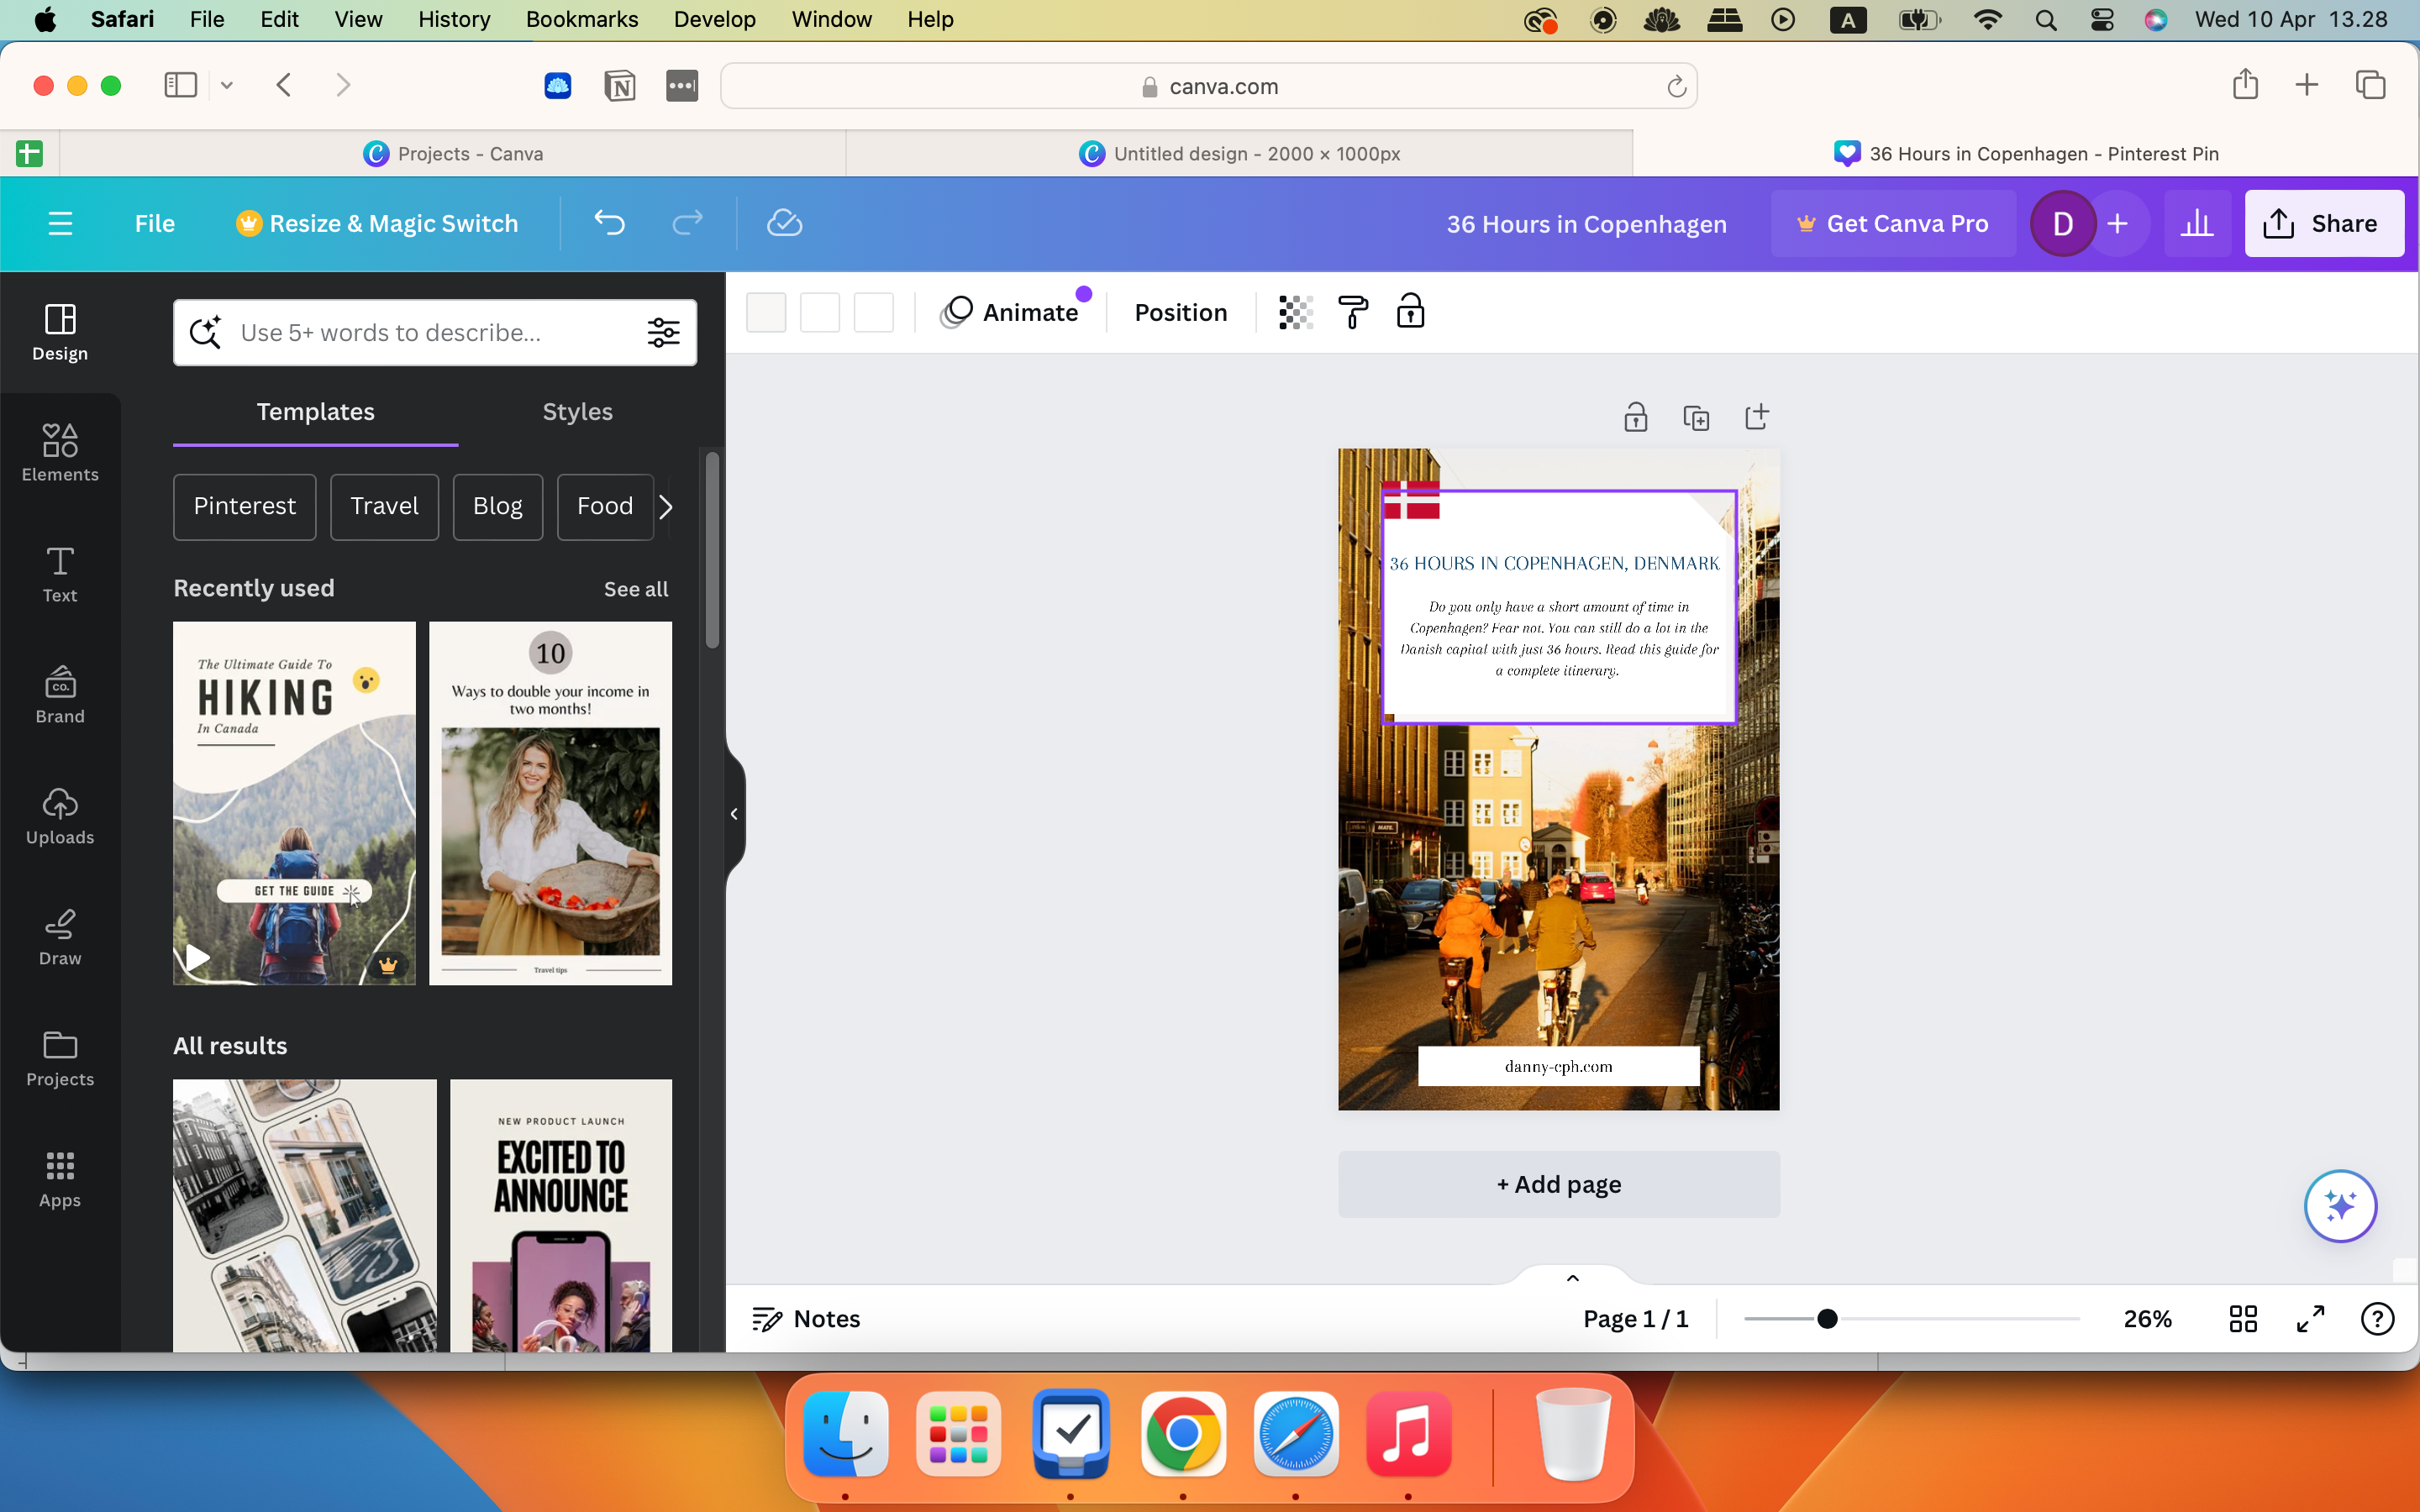
The good news is that Canva has plenty of user-friendly tools to help you organize everything more effectively. In the Projects section, you can access your favorite projects via the Starred folder. And if you want to see the pictures you’ve added in Canva yourself, go to Uploads.
You can also create folders to keep everything organized:
- Press control + your trackpad (Mac) or right-click (Windows).
- Select Folder and give your folder a name. Once you hit Continue, you can start adding projects.
In addition to using Canva’s extensive suite of features, there are several Canva apps worth checking out, such as TypeCraft and Sketch to Life.
3 Only Uploading Files From Your Computer
Canva makes it easy to upload images and other file types directly from your computer into your projects. However, one major mistake that even seasoned Canva users make is thinking that it’s their only option.
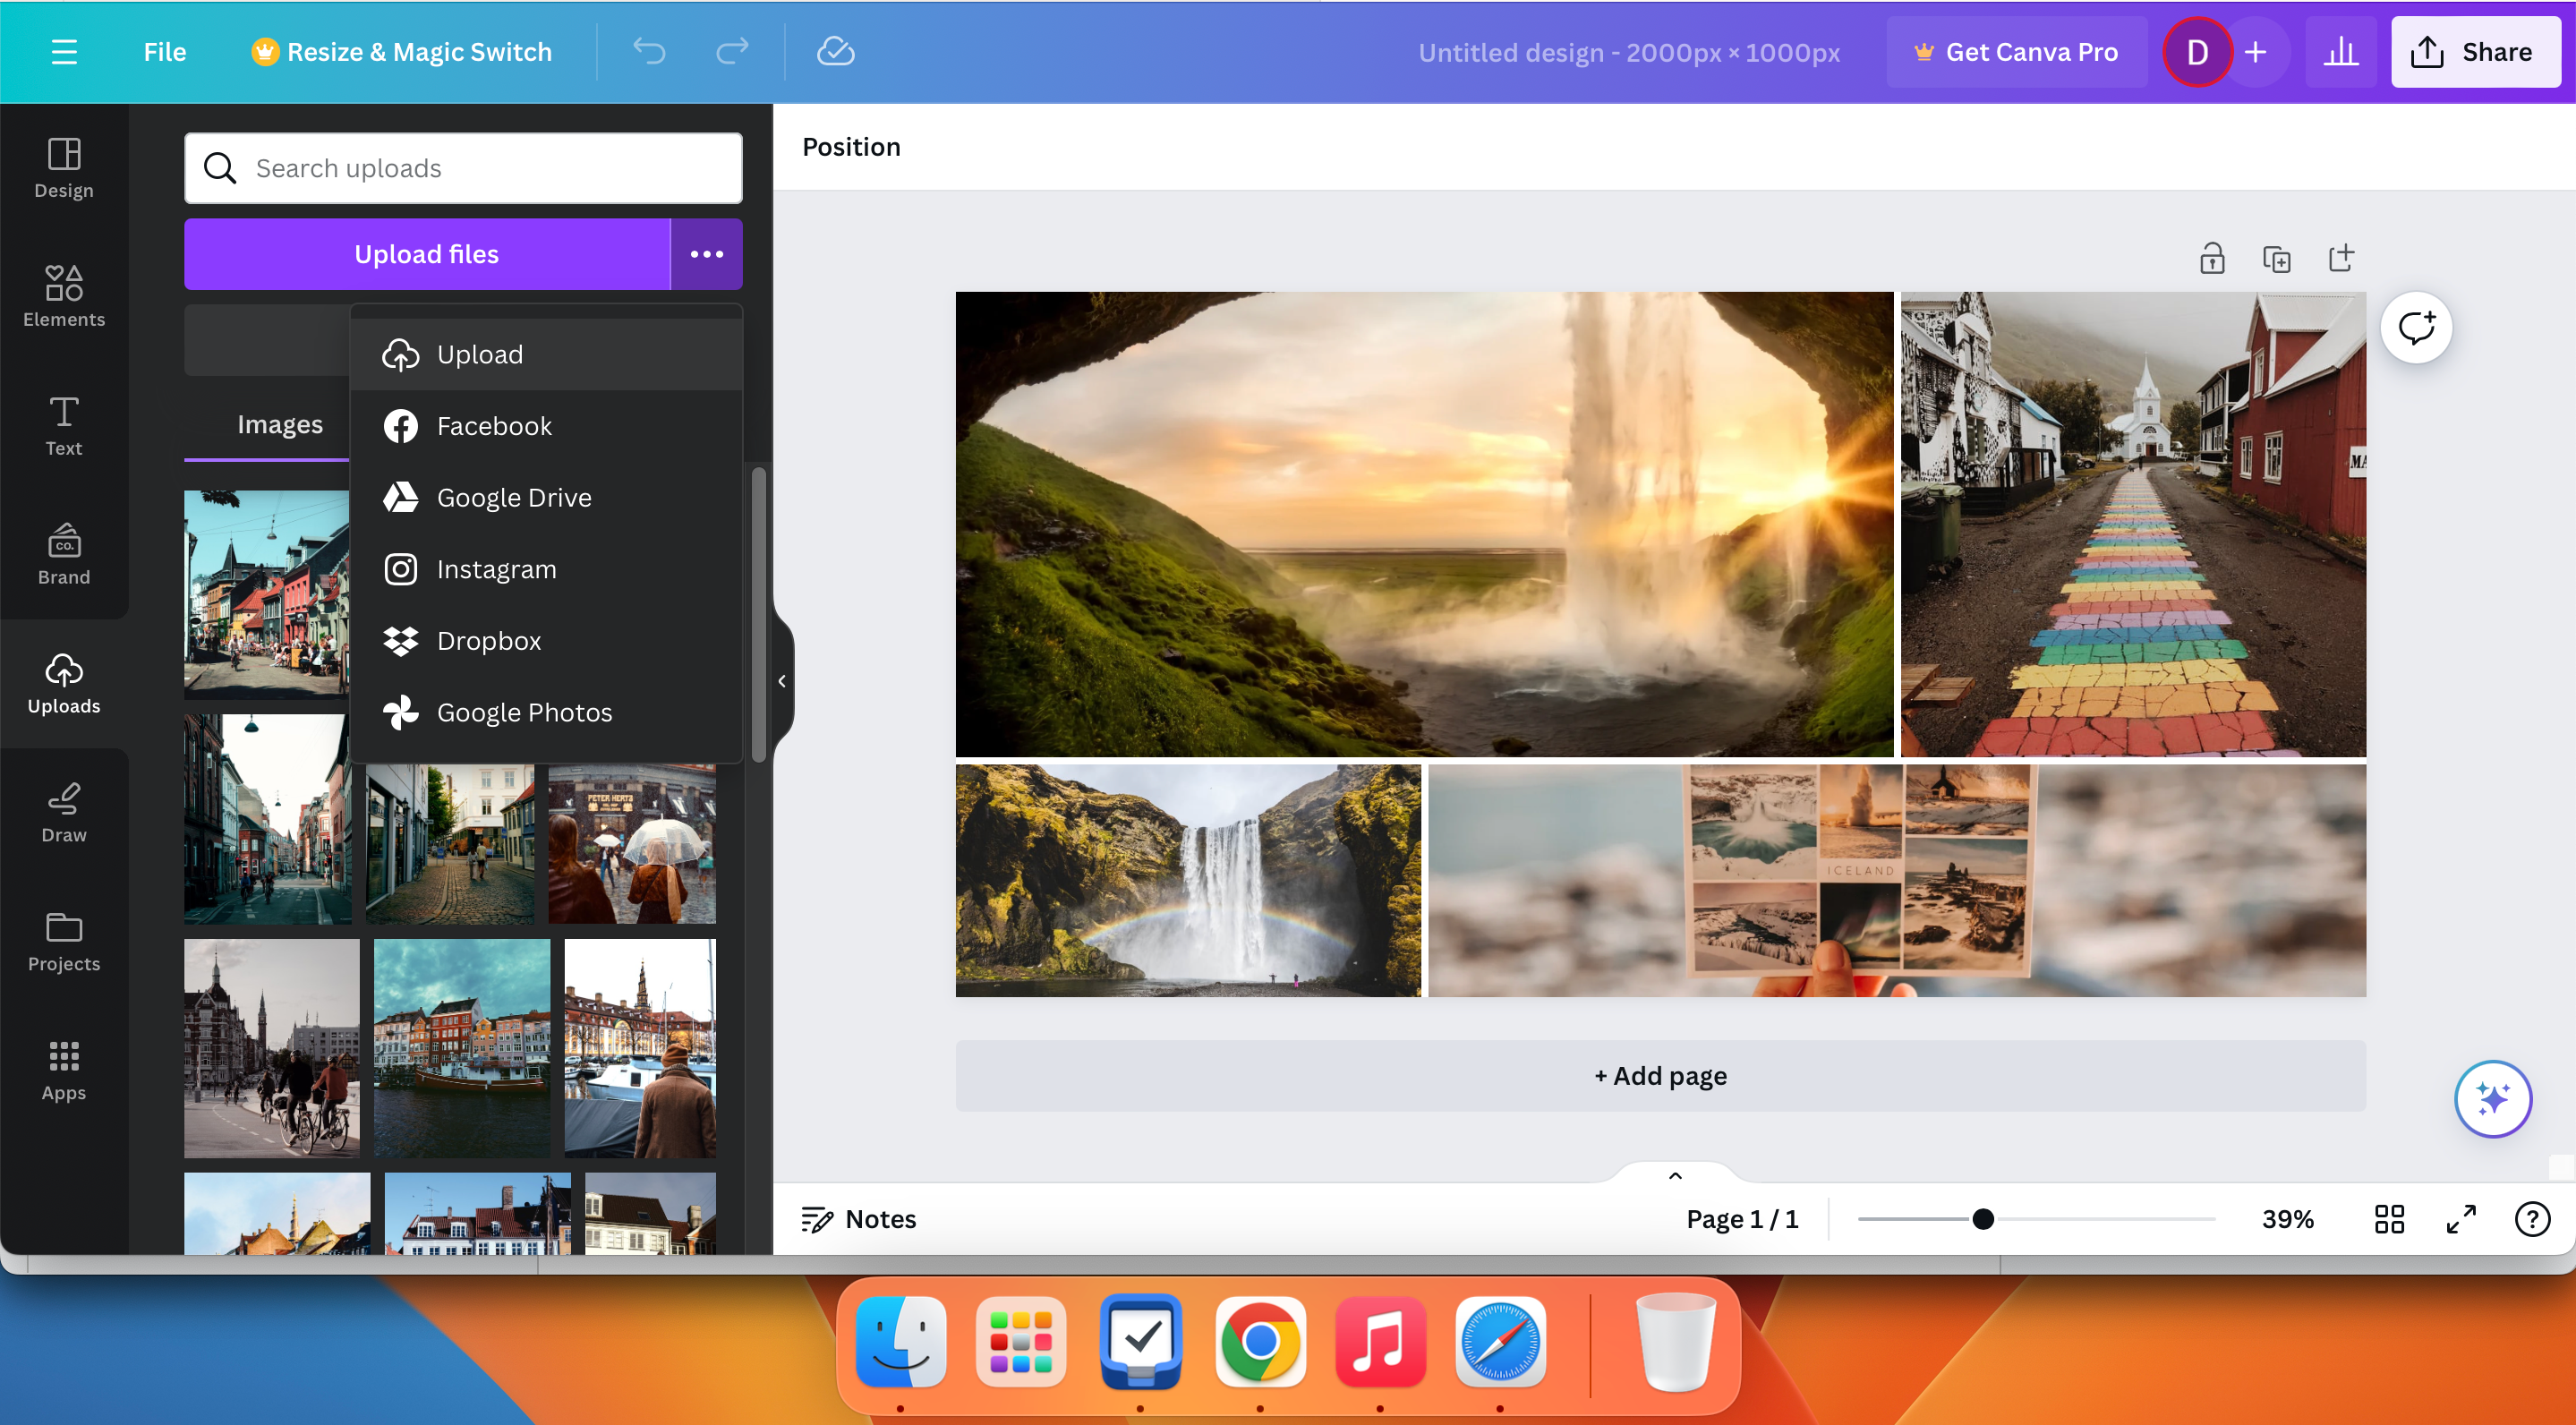
If you click on the three dots icon next to the Upload files button, you’ll find a dropdown menu with all the upload options. For example, you can add pictures from Dropbox and Google Drive. It’s even possible to import images from Instagram if you have some content on your feed that you think would be good for your project.
Once you’ve connected your account with each uploading option and verified who you are (if needed), you’ll have everything you need to add files and folders to your Canva projects. If you wish to maximize your experience using the app, check out these hidden Canva features you probably didn’t know about.
4 Using the Wrong Text Box Styles
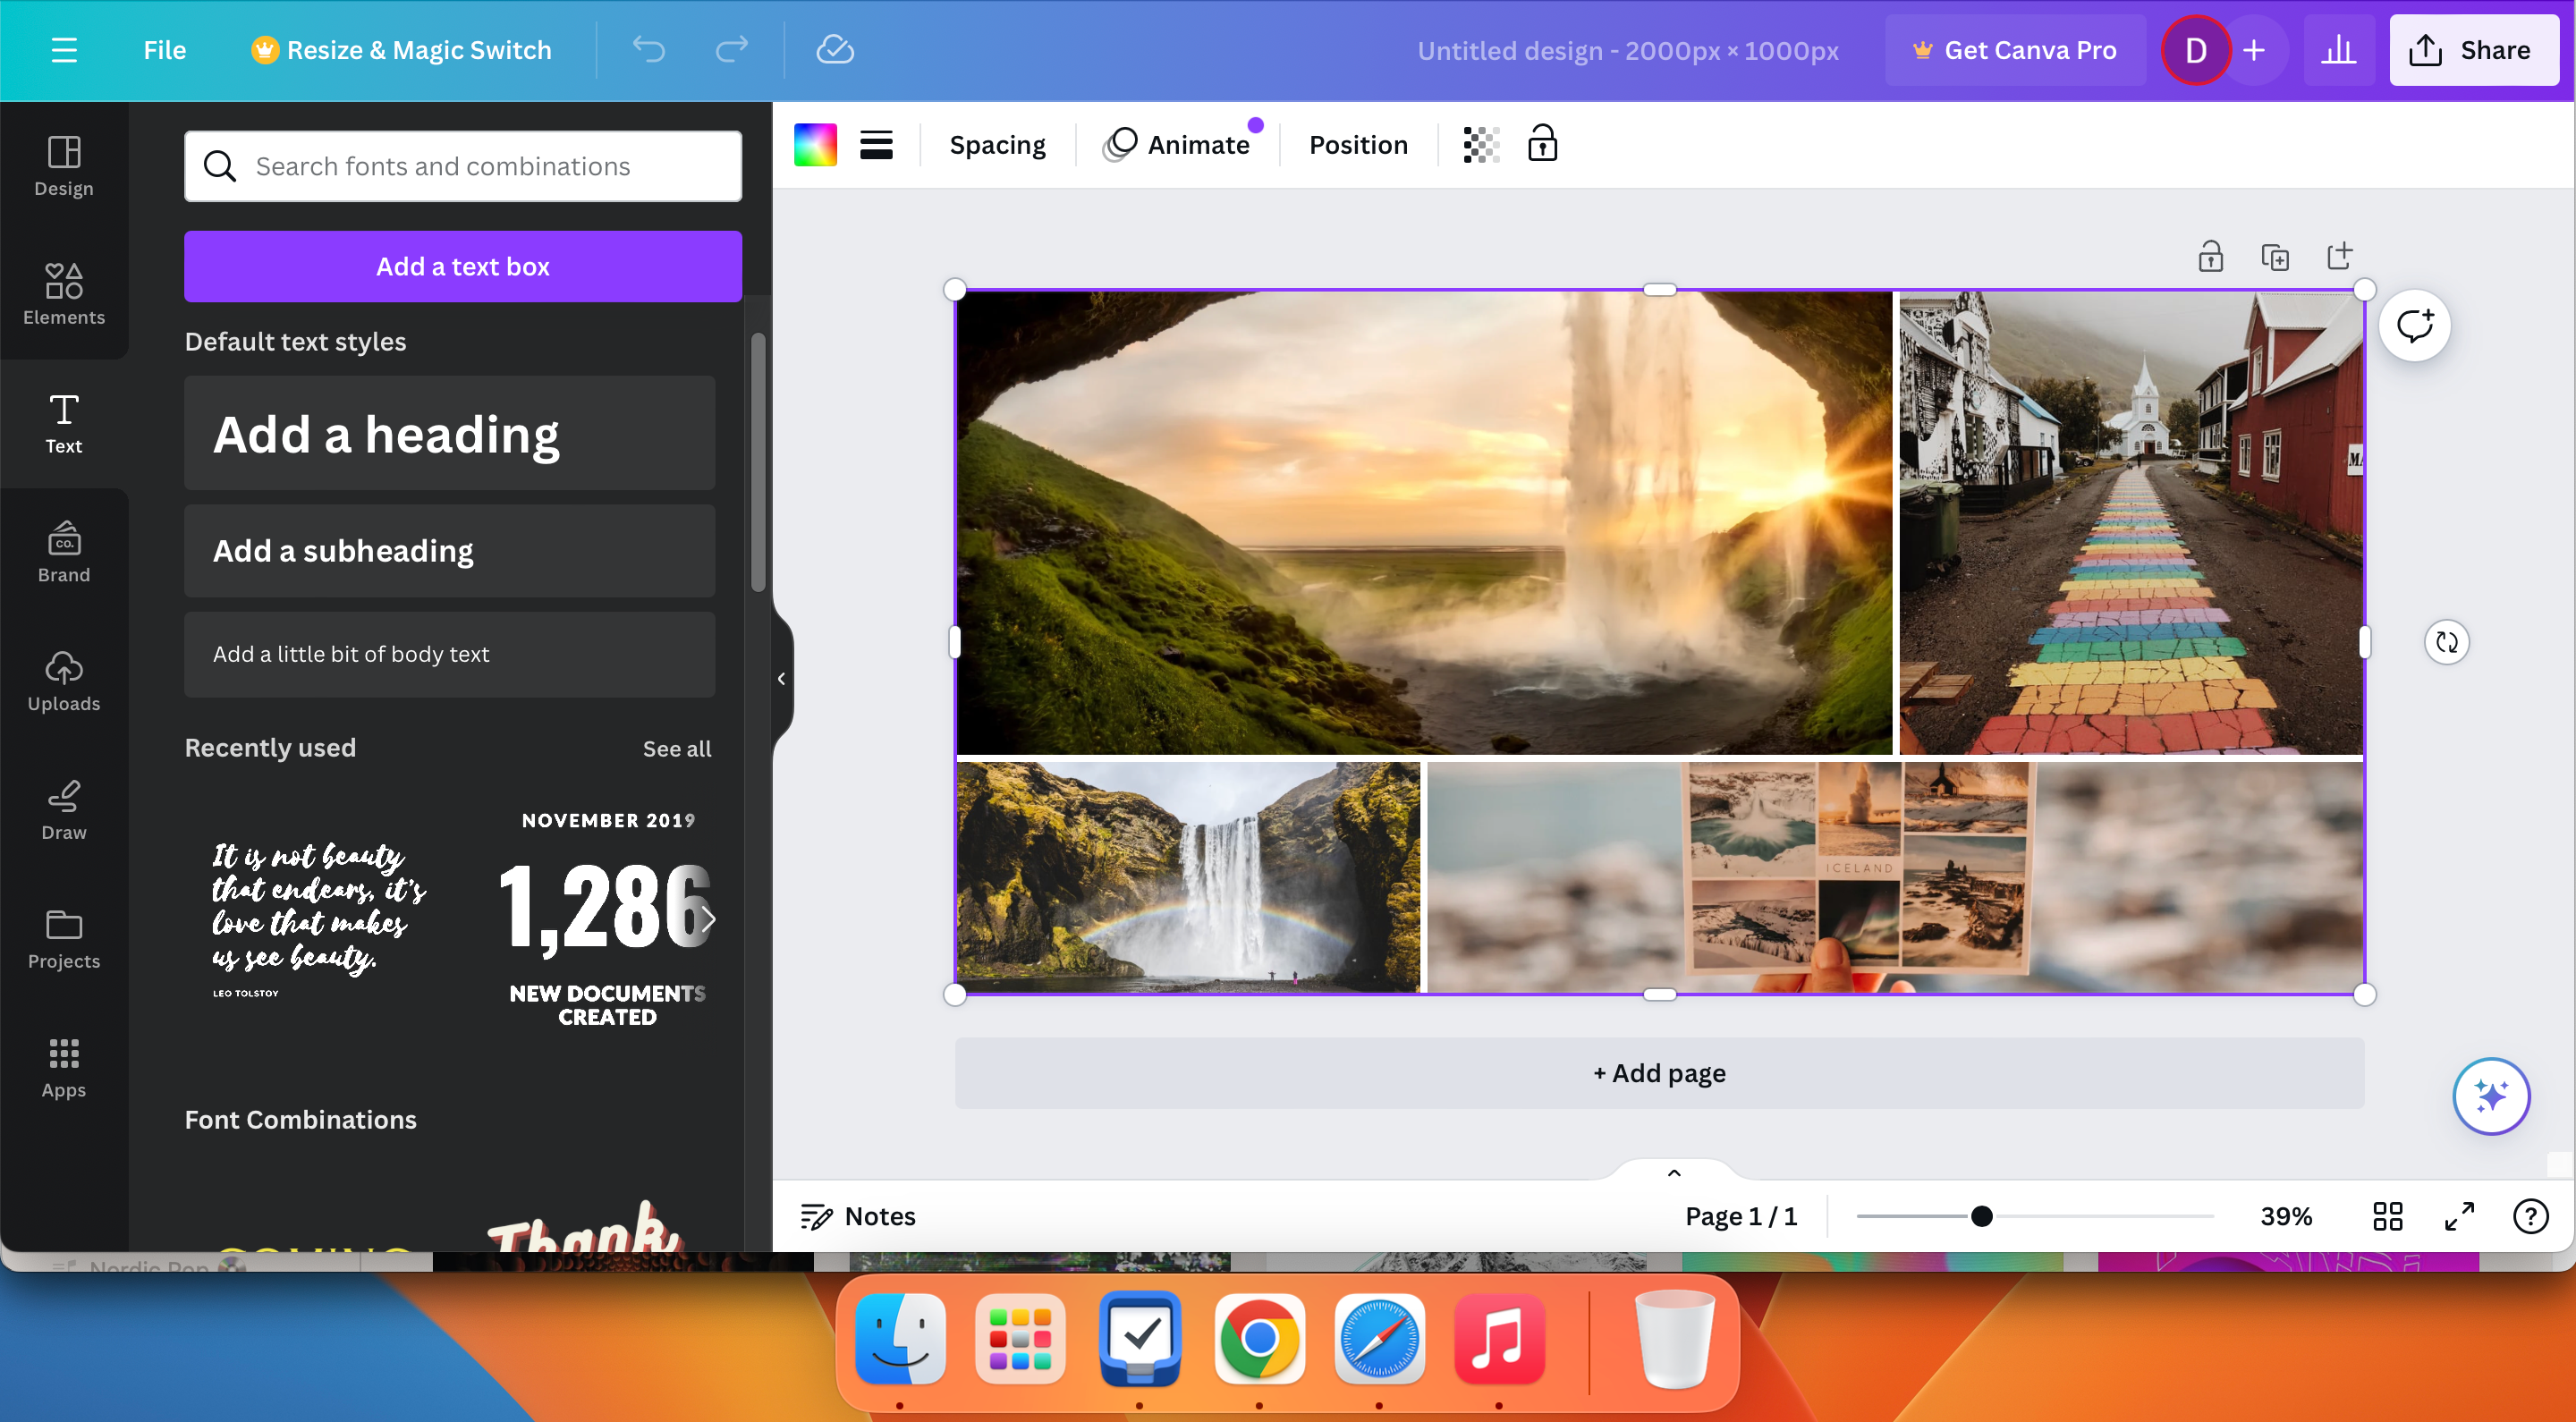
One of the biggest errors that I consistently made in my early days of using Canva was only using a standard paragraph text box for everything. Things can get quite confusing when you have to add lots of text to one place, and you’ll probably struggle with formatting issues at some point.
The best way to organize your text in Canva is by using the correct styles. For example, if you need to add a subtitle, Canva has boxes already pre-formatted with the ideal text size:
- Click on the Text tab in your Canva project.
- Under Default text styles, pick your required text box format.
- Customize the text, font, color, and so on once the box is added to your project.
5 Going Overboard With the Fonts
If you spend a lot of time online, you’ve probably encountered the “graphic design is my passion” meme at least once. In short, this refers to visuals that don’t seem to work for some reason. It could be excessive colors or overdoing fonts—many Canva users are guilty of the latter.
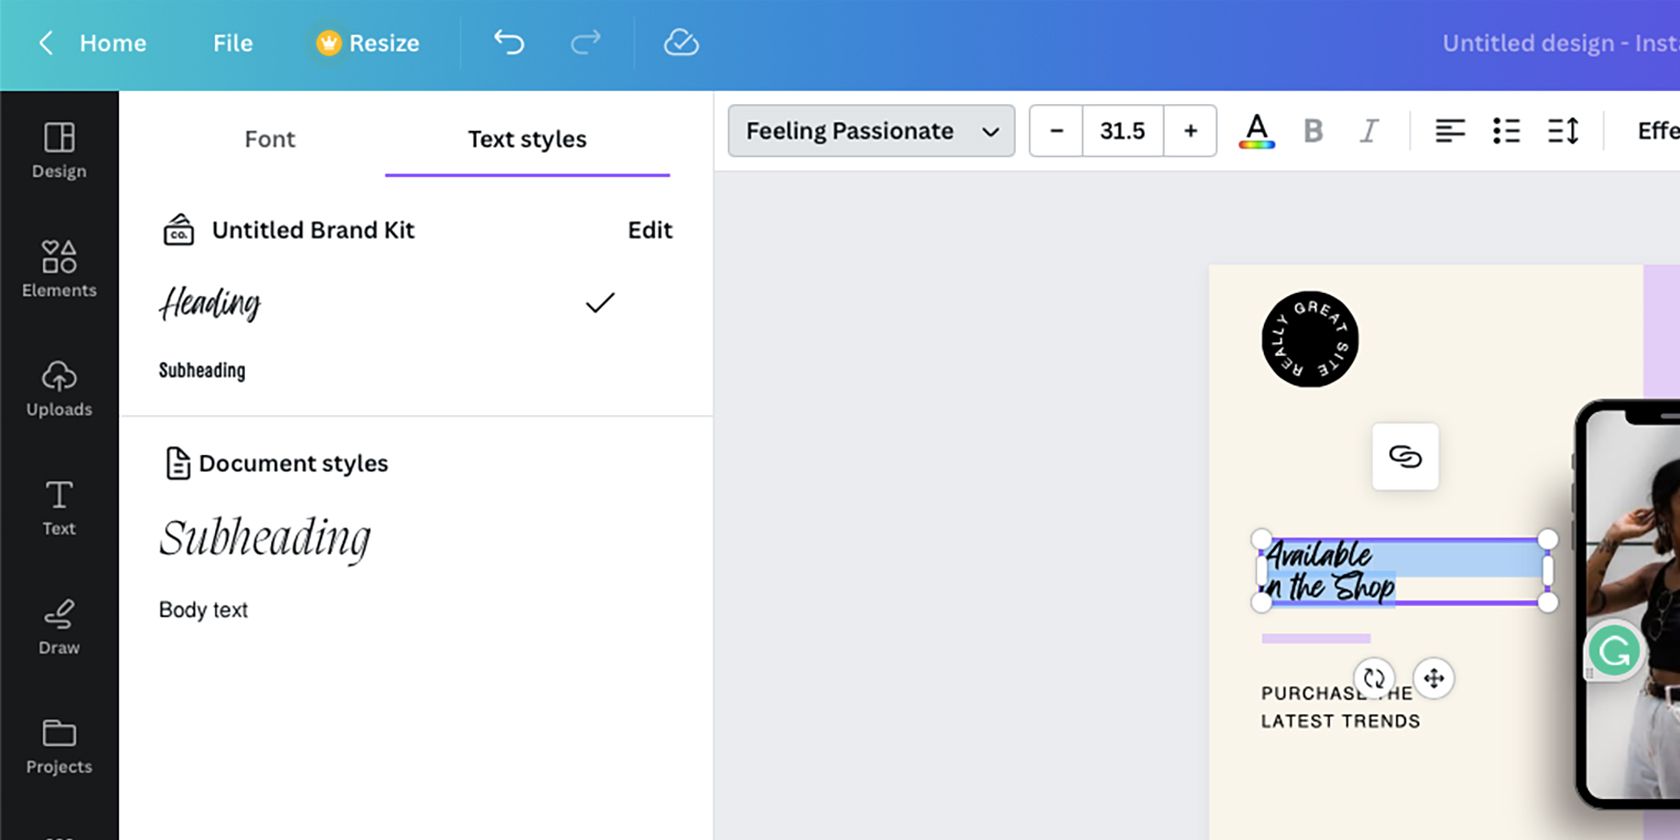
Using too many fonts in your design can make everything look tacky and unprofessional. If you look closely at most advertising boards, logos, and branding themes, you’ll see that they normally use two or three fonts at most. Because of this, you’re not having your attention taken away from the core message.
Experiment with the various fonts in Canva to see which ones best suit your style. For example, you might want to achieve a minimalist design in Canva, in which case two sleek fonts will be enough.
6 Using Fonts That Don’t Complement Each Other
Even if you only use two or three different fonts, you can still put yourself at a disadvantage if they don’t complement each other. For example, Old English wouldn’t work well with Comic Sans, people who view your designs will just end up confused.
This will require some experimentation. If you’re not sure where to start, look at your favorite brands and then research the types of fonts they use on their websites, products, blogs, and so on.
Canva might not have the exact fonts you want, but you can search for “[Font Name] Canva alternative” in Google to find similar ones.
7 Failing to Use the Pink Alignment Lines
During my early days as a Canva user, I freely moved the boxes around in each project until I was happy with the result. While this led to some pretty good results, there were also instances where everything looked disorganized because the boxes weren’t aligned properly. Luckily, Canva has an easy solution to this problem: alignment lines.
When you move an element in your Canva design, various pink lines and boxes will appear. These are designed to help you keep everything organized more effectively, so using them will make your designs look much cleaner.
Canva is one of the best design apps for beginners, but it’s very easy to make mistakes if you’re not paying attention. This guide illuminates common pitfalls, like not organizing your projects to using too many fonts. Start with implementing one tip at a time, and you’ll be golden!
