A clean boot on Windows 11 can help you fix anything from a slow computer to any specific program that’s suddenly gone haywire. It works by starting your PC with a minimal set of drivers and apps, which lets you figure out the cause of the error.
The good news is that it’s an easy process to boot your Windows 11 into a clean boot environment.
How to Clean Boot Windows 11
A clean boot in Windows is a troubleshooting technique that starts the system with a minimal set of startup programs and drivers. It helps you figure out whether an additional program is the cause of this problem, or if it’s due to issues within the system files.
The primary rationale behind a clean boot is simple: if the problem persists even after you’ve booted your Windows 11 into a clean boot environment, then the problem lies somewhere else on your PC. However, if you face no trouble during a clean boot run, then an app is most likely causing the bug. In this way, after you’ve pinpointed the cause of trouble with a clean boot, you can take steps to fix it.
To perform a clean boot on Windows 11, follow the steps below:
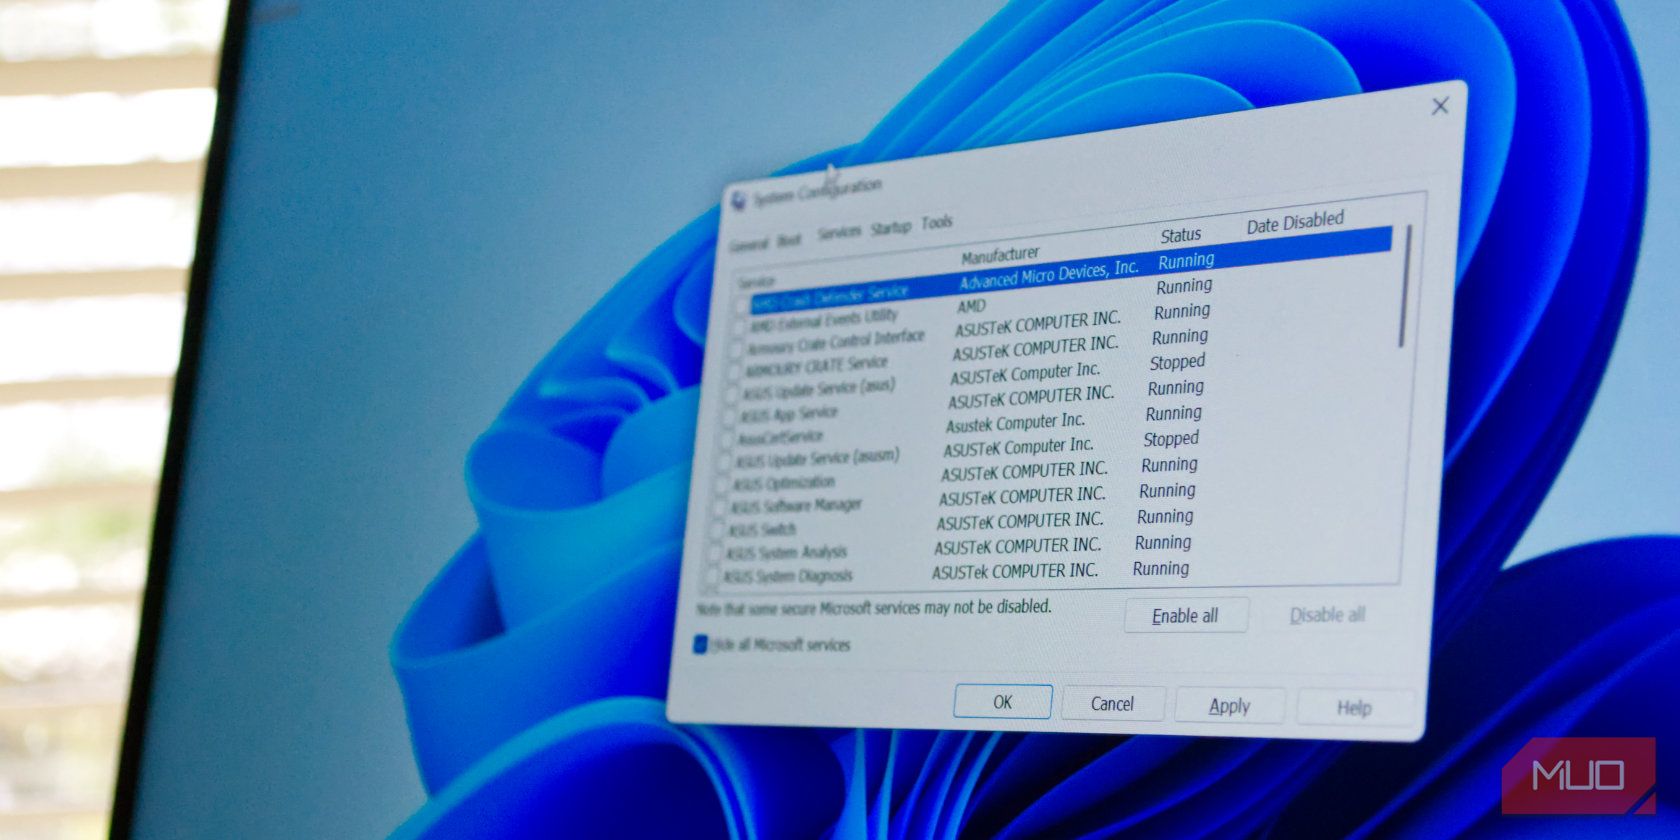
- Go to the Start menu search bar, type in “msconfig” and select System Configuration from the results.
- Switch to the Services tab, select Hide all Microsoft Services, and click on Disable All.
Now you have to launch the Task Manager. Here’s how you can do that:
- In System Configuration, go to the Start tab and select Open Task Manager.
- Now, one by one, disable each app under the Startup tab.
- Go back to Startup tab in System Configuration and select OK.

On your next restart, Windows will be launched in a clean boot environment.
If the problem persists, then the issue is something else. As such, you might have to try out different methods to fix it. If that’s the case for you, then jump to the next section to get back to a normal boot-up.
However, if your computer is working fine after the clean boot, then we’re on to something. From here, you’ll enable all the apps one by one, which will help you find the app that’s the culprit behind your Windows bug. Here’s how:
- Open the System Configuration.
- Go to the Services tab, select the apps in the top half of the list, and click Enable. (If the problem reappears, this will eliminate the bottom half of the apps.)
- Then, click on Task Manager and head to the Startup tab.
- Select the top half of the services and Enable them.
- Finally, click on OK and select Restart.
Repeat the procedure until you are left with the app that’s causing trouble on your PC.
How to Stop Clean Boot on Your Windows 11
Whether the clean boot fixed your Windows 11 bugs or not, you have to get out of it eventually. To do that, follow the steps below:
- Head to the Start menu search bar, type in ‘msconfig’, and select System Configuration.
- Click on the Services tab, select the Hide all Microsoft services check box, and click the Enable all button.

Now, follow the steps below:
- Now click on Startup > Open Task Manager.
- Select every disabled application one by one and click on Enable.

That’s it. Now, do a quick reboot, and your Windows 11 will boot normally from here on.
Clean boot is a handy method to keep in mind for figuring out the problems on your Windows 11. Although people sometimes don’t quite know the difference between Clean boot and Safe mode, clean boot is different in that it gives you more control over which apps and services can run during startup.