Key Takeaways
- You can press your iPad’s top and Home/Volume buttons simultaneously to take a screenshot.
- You can also use gestures, Siri, and Assistive Touch to take screenshots on an iPad.
- iPad accessories like the Magic Keyboard and Apple Pencil also make it easy to take screenshots.
Whether you want to send your lecture slides to a classmate or share a meme with friends, you’ll need to take a screenshot on your iPad at some point. Fortunately, your iPad offers multiple options, and we’ll cover them all below.
Take a Screenshot on iPads Without a Home Button
The standard way of taking a screenshot is using your iPad’s physical buttons. If you have a modern iPad that doesn’t feature a Home button, like the 11-inch iPad Pro, iPad (10th generation), or iPad Air (2020 and later), follow these two steps in quick succession to take an iPadOS screenshot:
- Press your iPad’s top button (when in portrait orientation) and either volume button simultaneously.
- Release both buttons quickly.
If you have your iPad’s ringer switched on, you should hear a camera shutter sound and see a preview in the bottom-left corner, indicating that the screenshot has been captured.
Take a Screenshot on iPads With a Home Button
If you still own an iPad with the iconic Home button, the buttons you need to press are slightly different. Here’s what you need to do:
- Press your iPad’s top button (when in portrait orientation) and Home button simultaneously.
- Release both buttons quickly.
You can tap the preview to access the various Apple Markup tools along with Share and Delete options.
Use Your Apple Pencil to Take iPad Screenshots
If you use your iPad to take handwritten notes and study, you can also use your Apple Pencil to take a screenshot. All you need to do is swipe up with your Apple Pencil from the bottom left or bottom right corner of your iPad’s screen.

Once your screenshot has been captured, you can use the tool palette at the bottom of your iPad’s screen and draw on your image using your Apple Pencil. You can also tap the Share icon in the top-right corner of the screen to send it to your contacts or save it as a document. Tap Done to save the edited screenshot to the Photos app.
Use Gestures to Take iPad Screenshots
If your iPad is running iOS 16 or later, you can also use Gestures to capture your iPad’s screen. Here’s how:
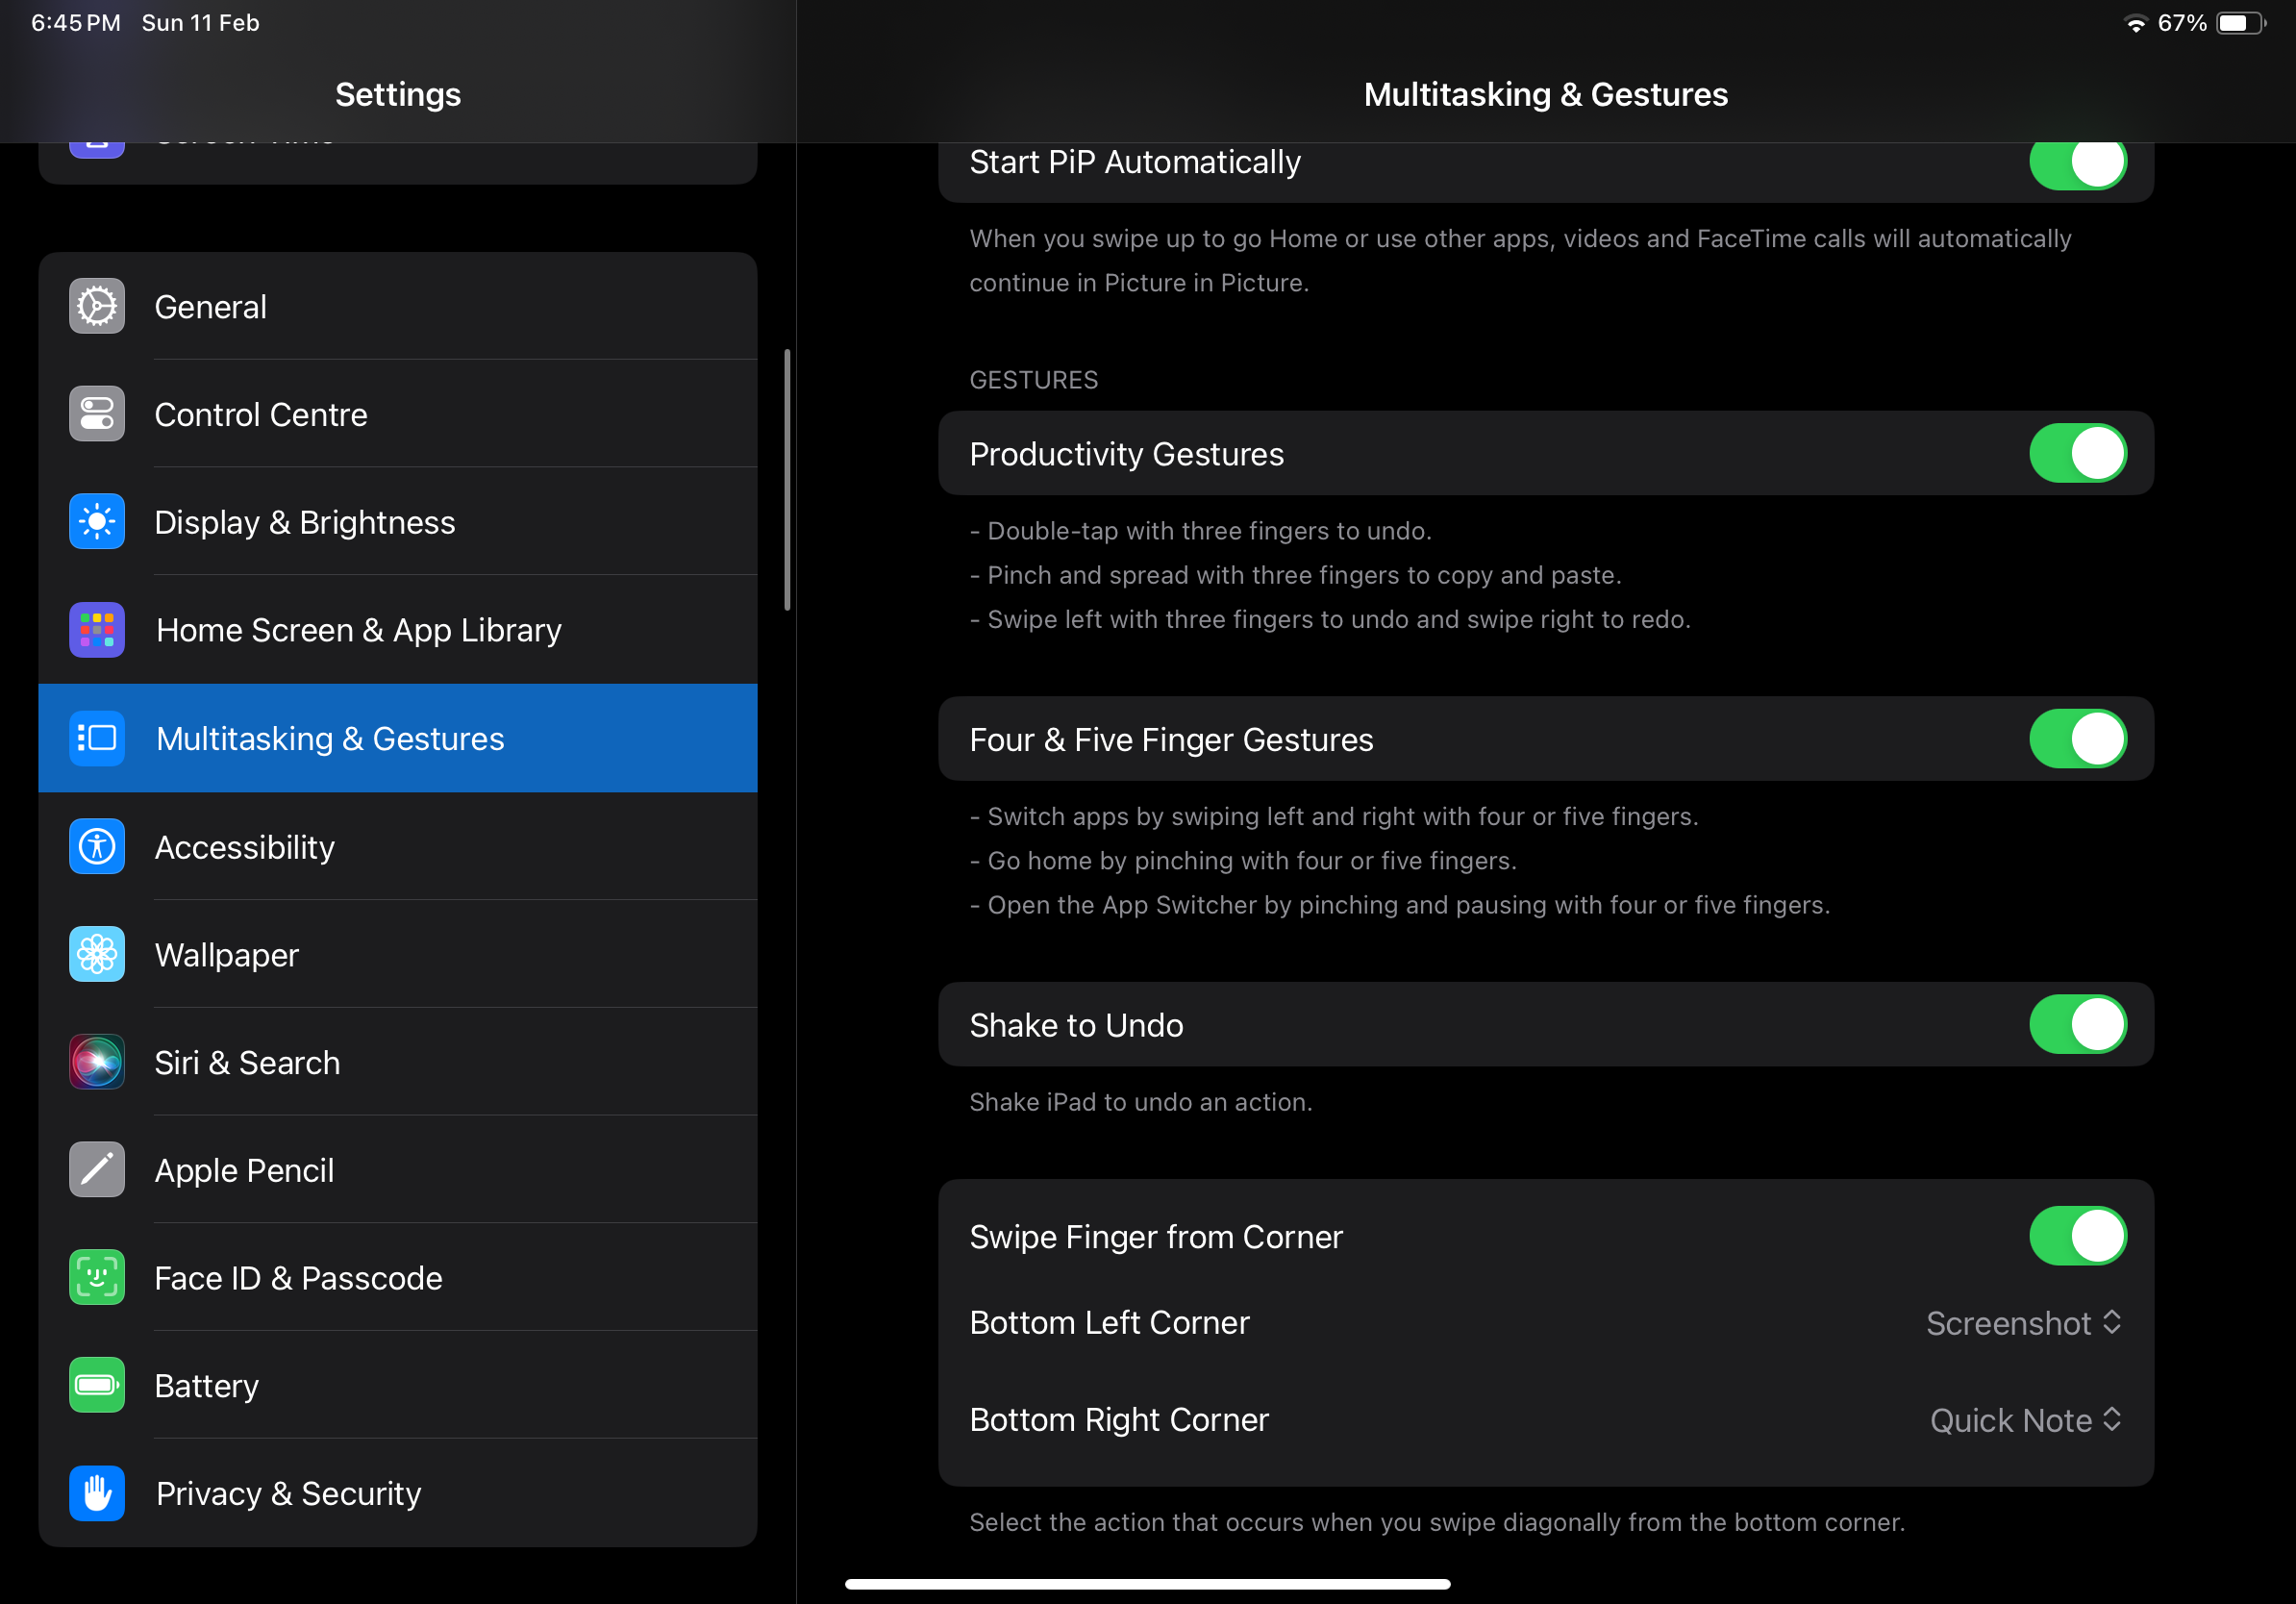
- Go to Settings and select Multitasking & Gestures from the sidebar.
- Toggle the switch next to Swipe Finger from Corner.
- Now, tap Bottom Left Corner or Bottom Right Corner and choose Screenshot from the three options.

Now, all you need to do is swipe diagonally from the corner you set to capture an iPadOS screenshot. So, if you don’t have an Apple Pencil but want to take screenshots with a simple corner swipe, we highly recommend enabling Gestures!
Ask Siri to Take iPad Screenshots
Siri comes in clutch when you want to take a screenshot on your iPad but don’t want to touch it with your messy hands. One of the many things Siri can do is take a screenshot.
Simply activate Siri by saying “Siri” or “Hey Siri” and say something like, “Take a screenshot.” You can also ask Siri to send your screenshot to a contact by saying, “Take a screenshot and share it.”
Use Assistive Touch to Take iPad Screenshots
If your iPad’s Side, Volume, or Home button isn’t working, or you’re simply looking for a way to capture screenshots without using your iPad’s physical buttons or invoking Siri, you can use AssistiveTouch. Here’s how to capture a screenshot by enabling AssistiveTouch on your iPad:
- Go to your iPad’s Settings > General > Accessibility.
- Toggle on the switch next to AssistiveTouch.
- You should now see a virtual Home button on your iPad’s screen.
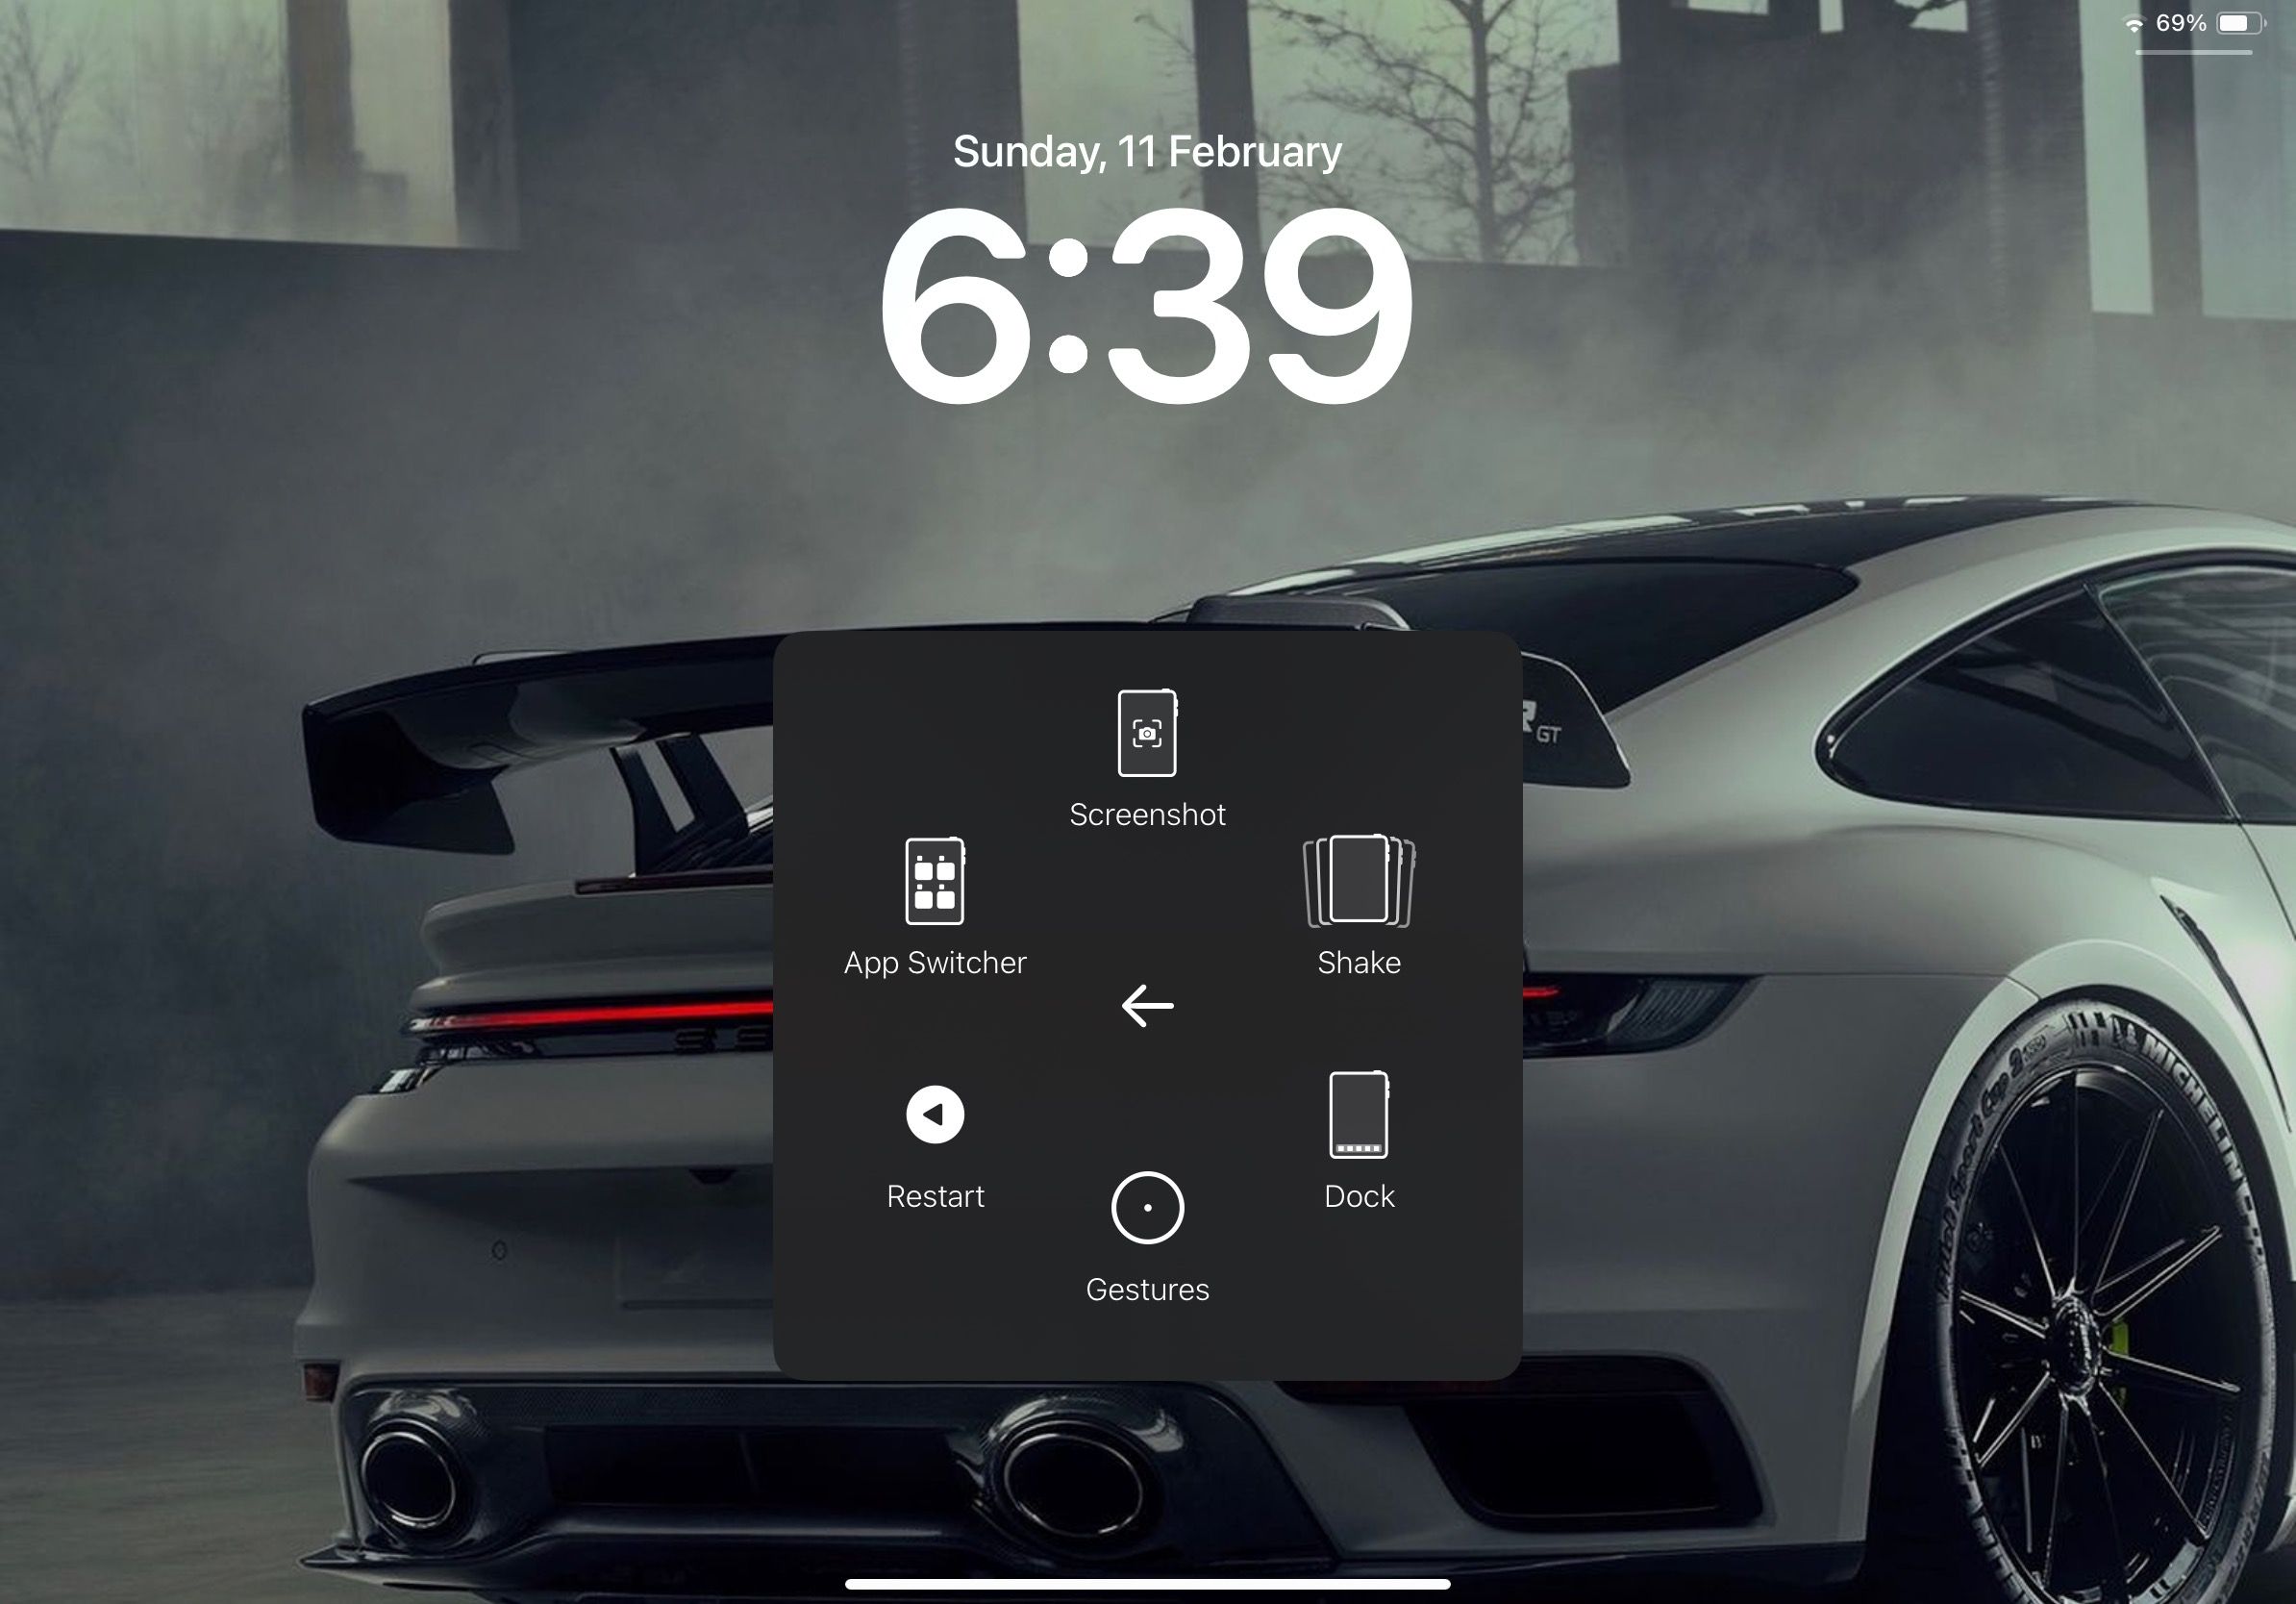
- Tap the virtual Home button and tap Device > More.
- Finally, tap Screenshot.

Take a Screenshot With Your iPad’s Keyboard
One of the reasons why you should consider using your iPad with a wireless keyboard is because you can use keyboard shortcuts. If you’re familiar with useful Mac keyboard shortcuts, just know you can use them on your iPad too.

So, if you’ve connected an Apple Magic Keyboard or Magic Keyboard for iPad accessory, simply press Command + Shift + 3 on it to take a screenshot of your iPad.
Most iPad users know how to use their iPad’s physical buttons to capture screenshots. However, many aren’t aware of other methods we’ve mentioned. Once you get the hang of them, they can help you save time in the long run.