Key Takeaways
- The HTVRont Auto Tumbler Press can handle larger objects like 30oz tumblers.
- Initial results may be inconsistent, and you’ll need to experiment to find the best quality.
- The press is quick to get started with and easy to use, but can be tough to make the most out of.
Whether you’re a pro Etsy seller or a soccer mom, the ability to make customized mugs, tumblers, and flasks is something you might want to add to your arsenal. With a craft cutting machine, and the HTVRont Auto Tumbler Press, you can be making your own professional-looking dishwasher-safe sublimated and heat-pressed tumblers in no time.
But getting those good results requires planning and experience, and it’s not quite the automatic experience it claims to be.
HTVRont Auto Tumbler Press
The Auto Tumbler Heat Press can handle larger objects up to 8.5cm diameter, like 30oz tumblers—but you need to set the time and temperature manually, and results can be inconsistent.
- Brand
- HTVRont
- Color
- White or pale blue
- Weight
- 4.3kg
- Capacity
- 7.5-8.5cm diameter cylinders (2.95-3.35 inches diameter)
- Dimensions
- 13 x 11 x 6.3 inches (328 x 278 x160mm)
- Materials
- Compatible with ceramic, metals, and some plastics
- Package Includes
- Gloves, and heat-resistant tape
- Works with larger, longer cylinders such as 30oz tumblers and sippy cups
- Quick to heat up and simple to use
- Doesn’t fully enclose mugs to the handle (even within stated specifications)
- Inconsistent results

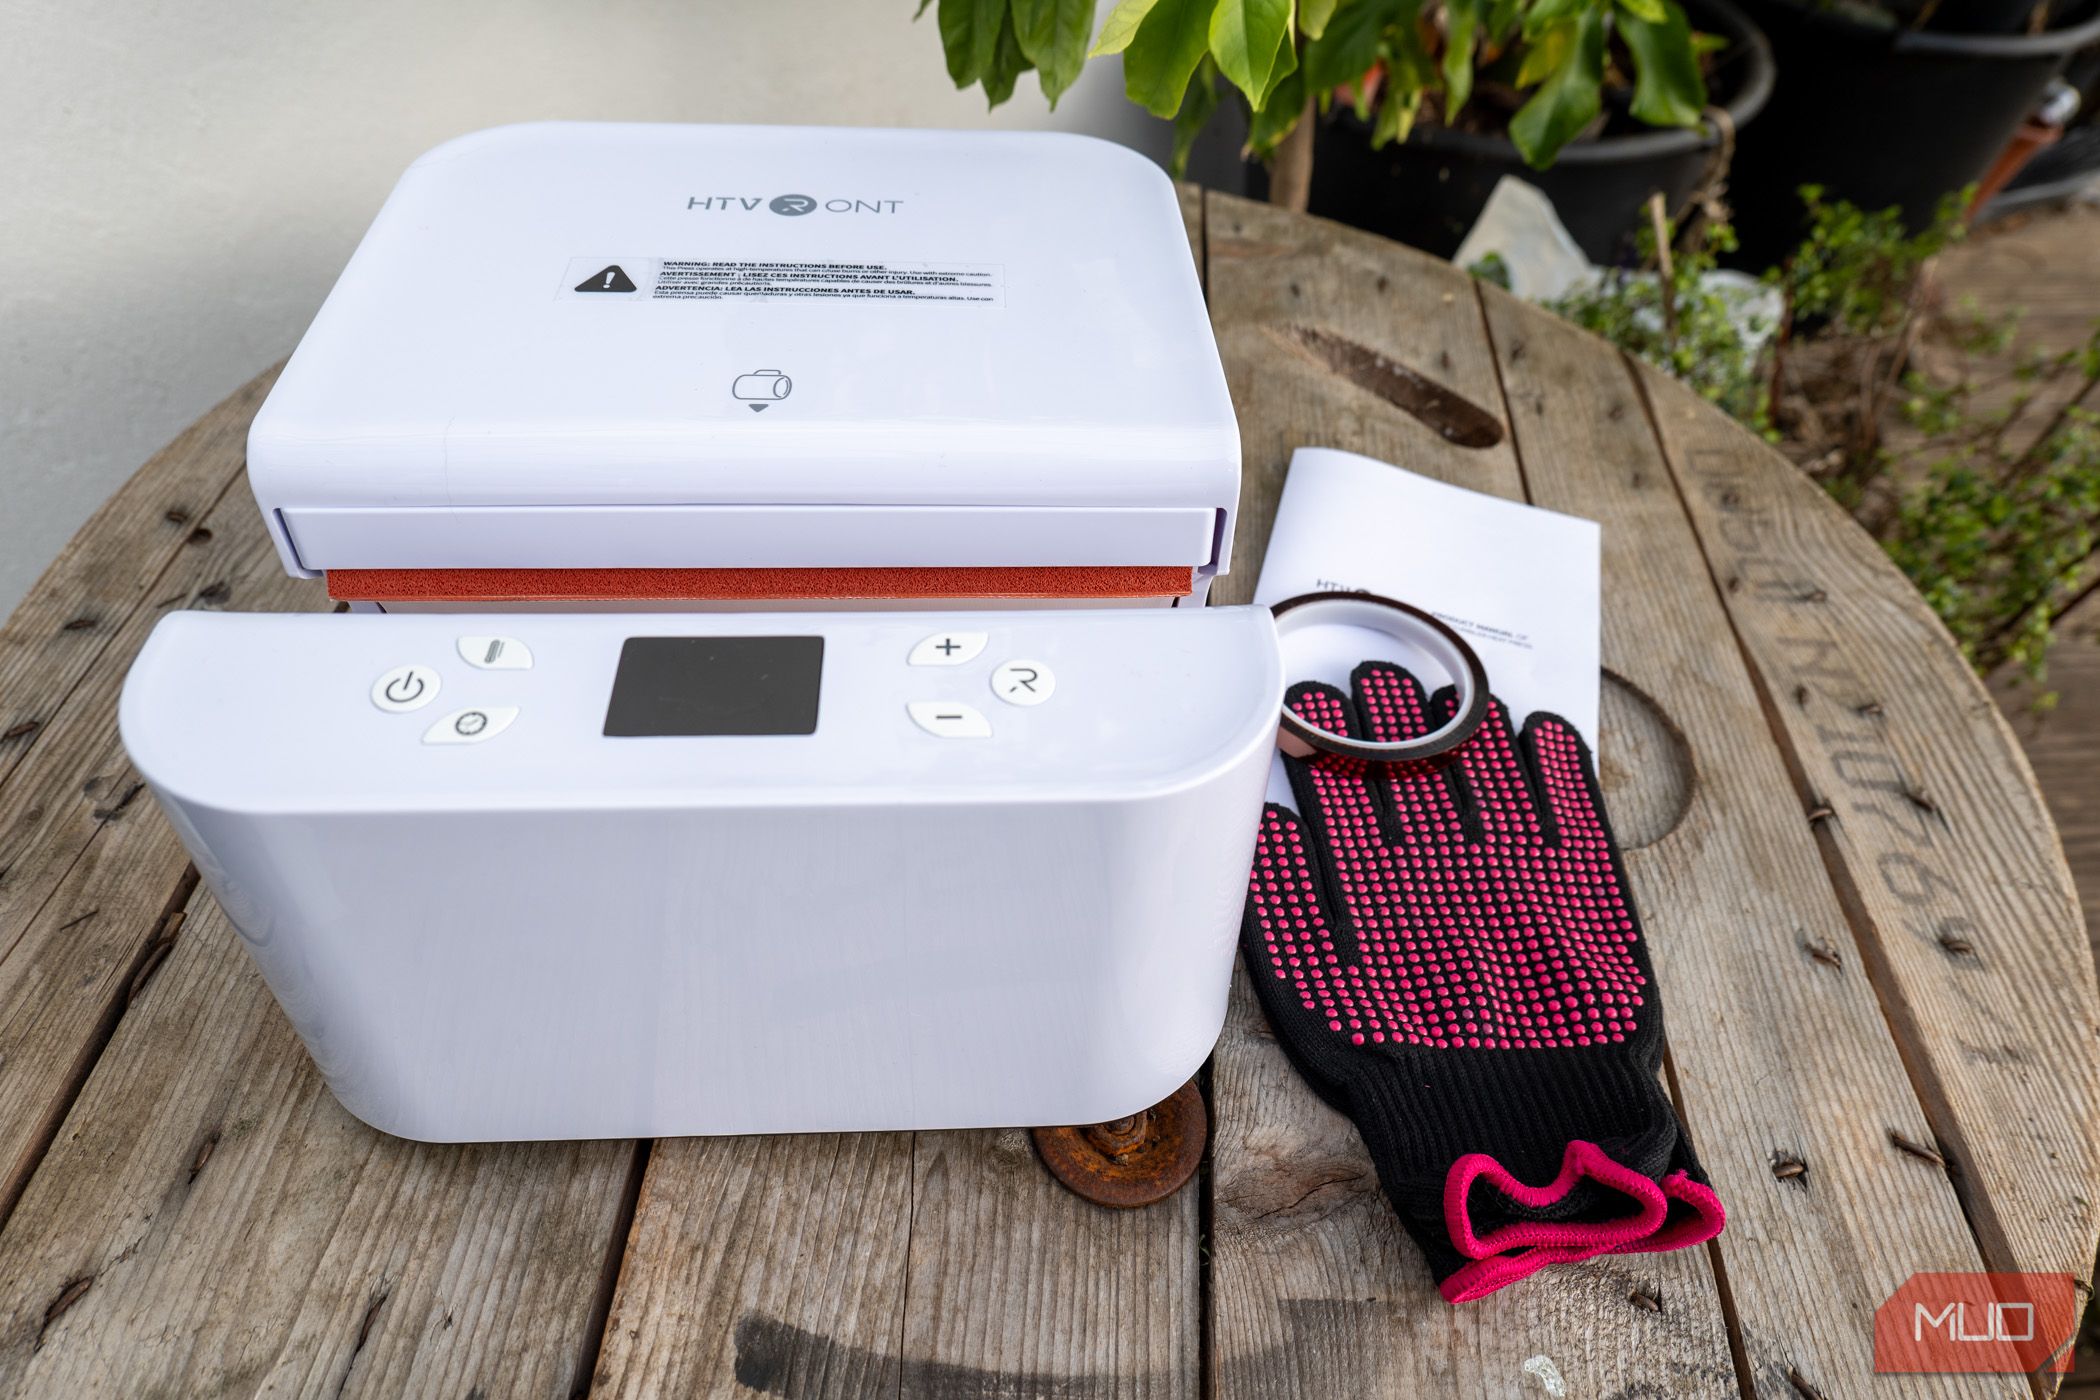
Inside the box, you’ll find the heat press itself, some heat-resistant tape to stick your designs down, and some snazzy pink heat-resistant gloves to handle and inspect your masterpiece hot off the press.
Crucially, there are no starter supplies included, so you’ll need to head off to Amazon or your local hobby shop to find sublimation blanks and other supplies. That’s right—you’ll need special “sublimation blanks”. While you could just use regular heat transfer vinyl and throw it onto any old white mugs, it won’t necessarily stick, and it won’t be durable.
The HTVRont Auto Tumbler Press is not a small machine, measuring in at 12.9 x 10.9 x 6.3 inches and weighing 4.3kg (9.5 lbs).
What is Sublimation, and What Do You Need to Decorate Your Mugs?
Sublimation is a process for transferring special infusible inks onto a sublimation substrate. This produces durable designs that are food-safe and washable. While you could heat transfer some regular vinyl onto a mug or other cylindrical object, it’s not recommended, and there’s no guarantee it’ll even stick.
So, what can you sublimate onto? In short, anything with a sublimation layer can be sublimated onto. Typically, this means buying ready-made sublimation blanks (mugs, tumblers, sippy cups, etc.). These already have a special layer that the infusible inks can transfer onto. There are also ways to apply this layer yourself with a spray or paintbrush, but I haven’t explored this.
But how do you make a sublimation design? You’ve got a few options there. The first is to use ready-made sheets of sublimated ink patterns, which you then cut your personalized design on your Cricut or Xtool M1, just as you would regular vinyl. It comes with a backing sheet in just the same way, and you’ll need to reverse the design.
Alternatively, you can print your own designs, though this isn’t a cheap option. You need a printer that allows you to fill your own inks, such as an Epson Ecotank—and that printer will then be dedicated to the task. You may be able to have your design printed by someone else, though, of course, depending on how many times you do that, it might be cheaper to invest in a printer and inks for yourself.
From Design to Mug: Simple and Easy to Use
Annoyingly, the HTVRont Auto Tumbler Heat Press is only compatible with cylindrical objects from 7.5 to 8.5cm in diameter (2.9-3.35 inches), but you need to delve into the manual to find that out. In practice, this means tumblers from 10oz to 30oz.
I’d much prefer if this was written on the machine somewhere—or even better, a circle on the top for the minimum compatible size that you could place your object on to test. The maximum is easy to tell, of course, because it won’t fit in the hole, but you wouldn’t know the minimum until pressing start, when you find it’s loose or not touching the sides.
That said, it’s not the end of the world if your object is just short of the minimum. You can purchase thick silicone sheets that keep your object snug and transfer the heat. You’ll need to increase the heating time slightly to account for this.
Using the Auto Tumbler Heat Press: Not So “Auto”

The “auto” part of the name doesn’t refer to setting the temperature and times, which needs to be done manually. It’s easy enough, but you’ll need to refer to the manual for the recommended settings—and sometimes, these can vary so wildly that the results are anywhere from half-baked to overcooked. Like most craft machines, you’ll need to experiment a lot, and note down which settings work best for your materials each time.
Instead, the auto part of the name comes from its ability to adapt to different objects, tightening around the circumference as needed.
Press the on button on the far left to start. Adjust the temperature and time needed, and wait until the button on the right turns green, meaning it’s up to temperature and ready to go. It can get as high as 200C (390F) in three minutes. Then, wearing the gloves, push in your object, and press the green button to begin the countdown.

My first stop was a mug and design that I’d negatively cut from a sheet of Cricut infusible ink. The results were mediocre, but to be expected given it was my first ever attempt. For the most part, it worked OK, but it highlighted some key shortcomings in the process.

Firstly, despite being within the 85mm diameter limit, it was quite a tight fit, and the heat press didn’t fully close around the mug, so the infusible ink by the handle didn’t work correctly. Second, a little of the ink leached out into the heat press. Lesson learned: use some parchment paper to prevent this in future. The parchment paper might also have helped it to slide around further, reducing friction between the mug and the heated surface.

My next stop was to try some cheaper generic ink sheets along with a taller flask, and this time to cut a design directly from them (not using the negative space).

I made the design using three different sheets and stuck them all down to be heat-pressed together. This time, the flask was small enough in diameter that the press covered it completely. However, again, it highlighted some flaws in my process and with the machine.

For whatever reason, closer to the joins, the designs didn’t transfer as well as they could have done. I suspect this was due to poor taping. You need to ensure the design is as flat as possible against the surface. Larger designs are harder to get right.

I could also see fairly blotchy results and messy patterns from the blank space. I had to remove some of the design that was originally cut out because the pieces were too small and didn’t stay on the transfer sheet; it could be that a few of these were miscut and left a small amount of ink on the transfer. As for the generally messy other areas, which are clearly visible as dark patches around the edge, this could be due to cheap materials. Inevitably, some of the ink leeches onto the transfer sheet, which is more obvious with darker inks.

By contrast, the red stamp of my son’s name came out beautifully.
Should You Buy the HTVRont Auto Tumbler Press?
The main selling point of the HTVRont Auto Tumbler Press compared to the leading competitor—the Cricut Mug Press—is the size. The Cricut model can only handle mugs, not tumblers; though with the connected software, the process is mostly automatic. While the HTVRont Auto Tumbler Press can handle a wider range of larger objects, I had mixed results. It’s difficult to pin down the issues, though. Was it a lack of experience, poor materials, or inconsistent heating and pressure from the press? Or all of the above?
If you only want to press mugs, I’d suggest sticking with a dedicated mug press. But if you want to expand your crafting to larger cylindrical objects, the HTVRont Auto Tumbler Press might be the one for you. At $160 with the on-page Amazon coupon, the HTVRont press is only $10 more than the Cricut. For the flexibility it offers, that seems like a great deal, but it’s not a beginner-friendly process, and will require lots of experimentation.

HTVRont Auto Tumbler Press
The Auto Tumbler Heat Press can handle larger objects up to 8.5cm diameter, like 30oz tumblers—but you need to set the time and temperature manually, and results can be inconsistent.